Cardboard stock sorting shelf – design and build
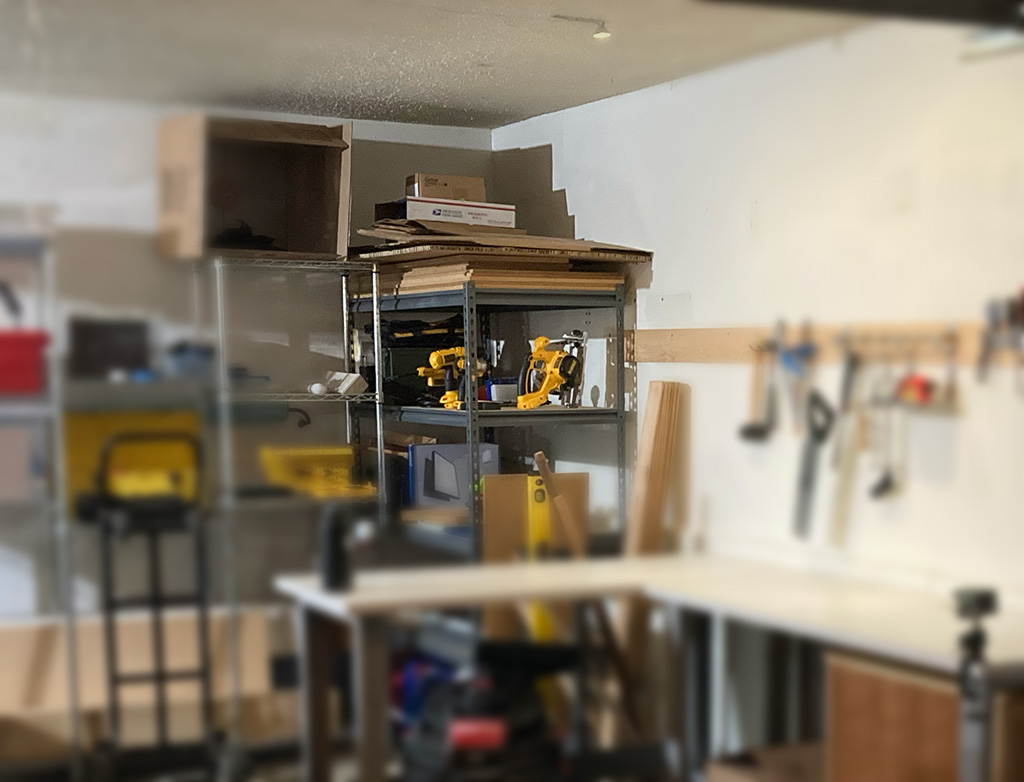
I was in the mood to build something with my hands, and I have been working on getting my garage organized into a functional space to do all sorts of maker-y things. I have a strong tendency to “collect” various materials that I think will be useful eventually. In order to keep my hoarder tendencies in check, I work very hard to cull my collections and make sure the material I keep is in usable condition and easy to grab and use.
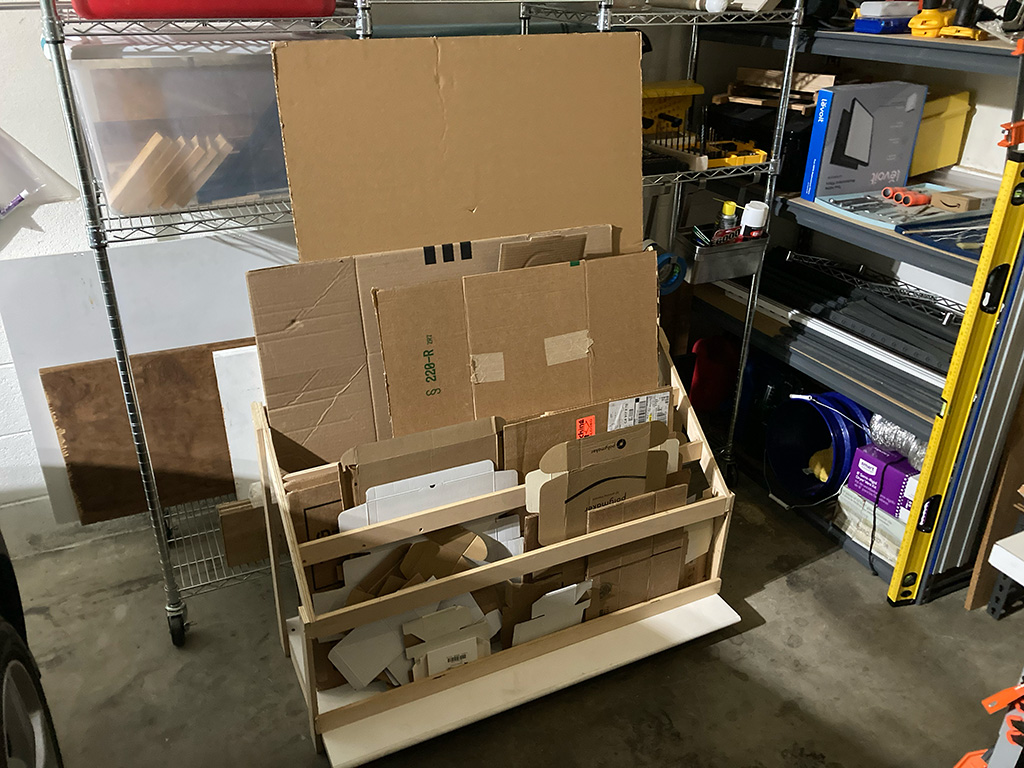
Cardboard is incredibly useful. I built a paint booth recently, and I end up using cardboard for prototyping and boxes for shipping and also just holding stuff. But my collection of Good Cardboard™️ was not easy to reach and hard to take stock of.
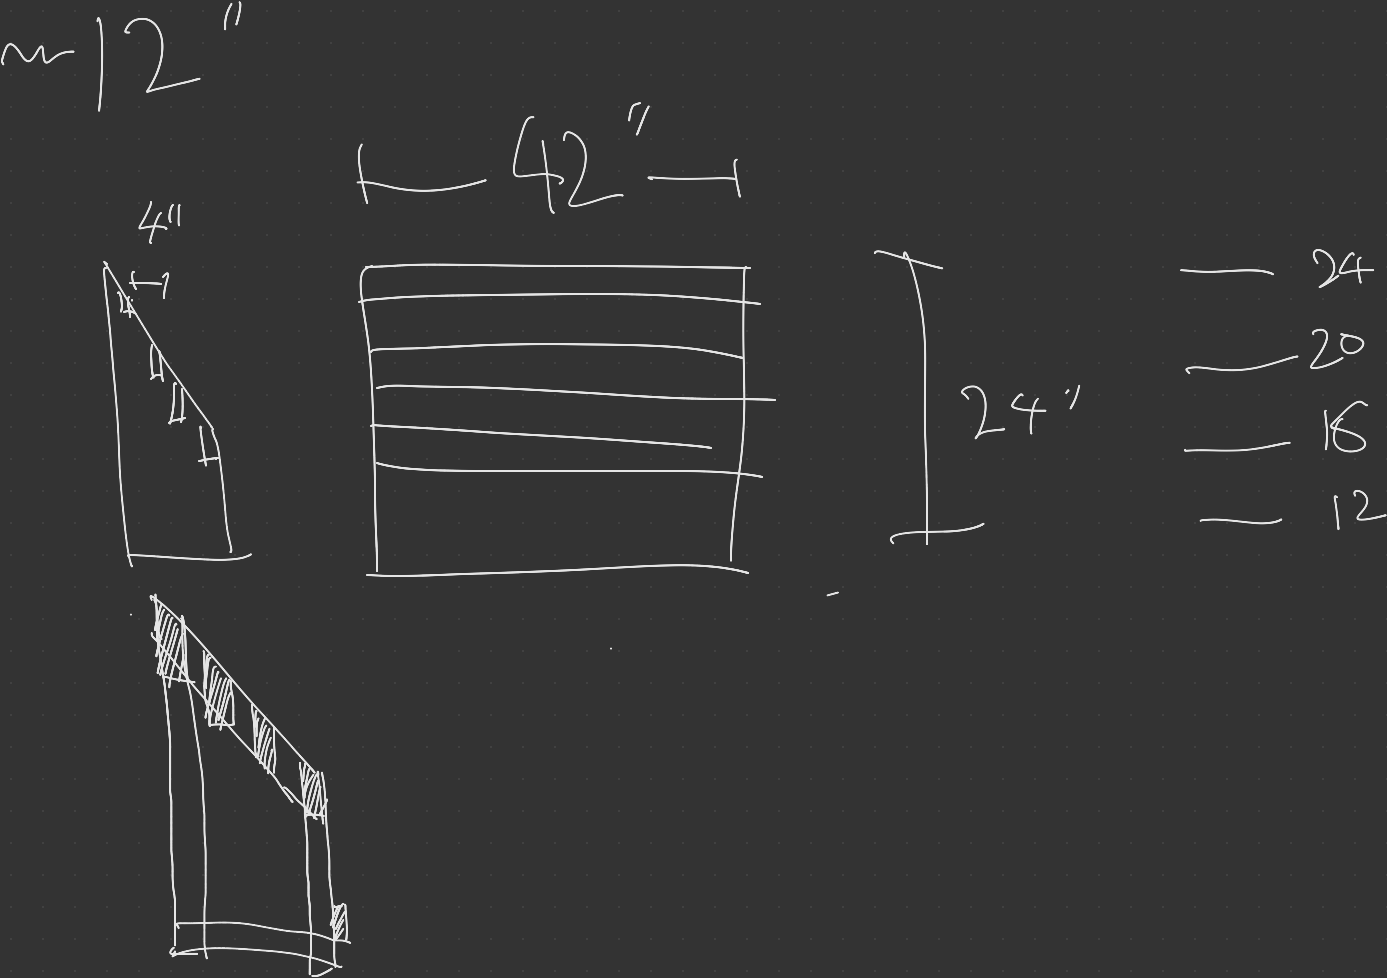
I did some very rough sketching in Evernote to help visualize some ways to store and sort my collection, and ultimately settled on a simple design that I thought I’d be able to make. Most of the pieces could fit in a 40-inch wide rack, and the range of heights that were needed to stand the cardboard upright fit pretty well between 12 and 24 inches. Serendipitously, I had a scrap piece of 42-inch wide, 1/2-inch thick Baltic birch (probably) plywood that was a former closet shelf.
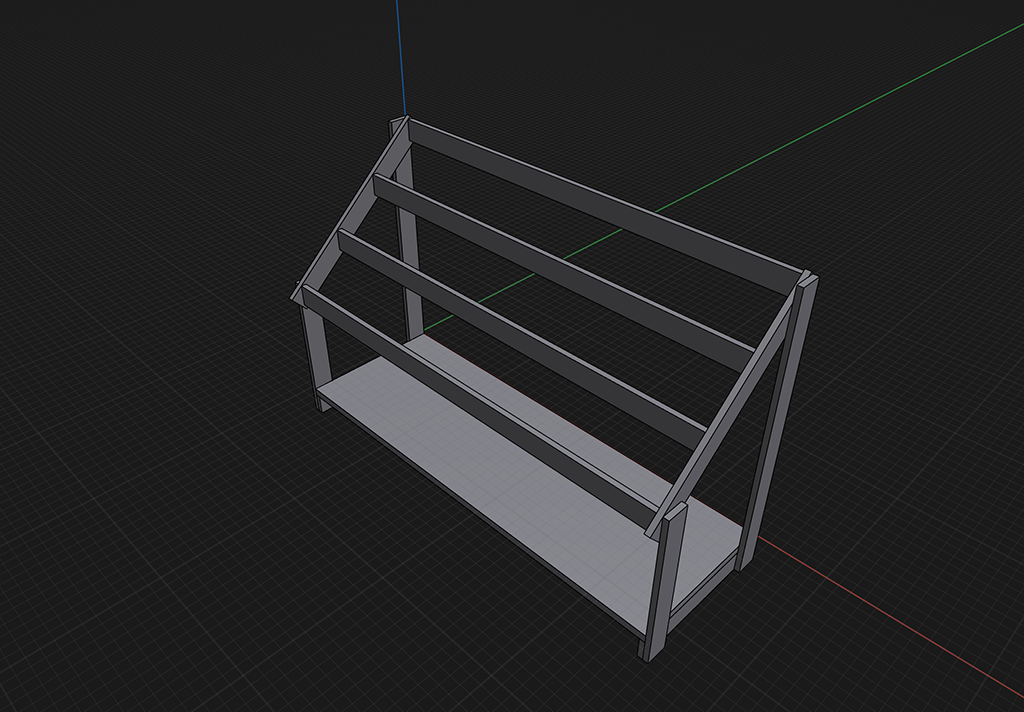
With the sketch in mind, I jumped into Shapr3D and modeled the shelf with dimensions and got a good spatial understanding of how I’d build the shelf.
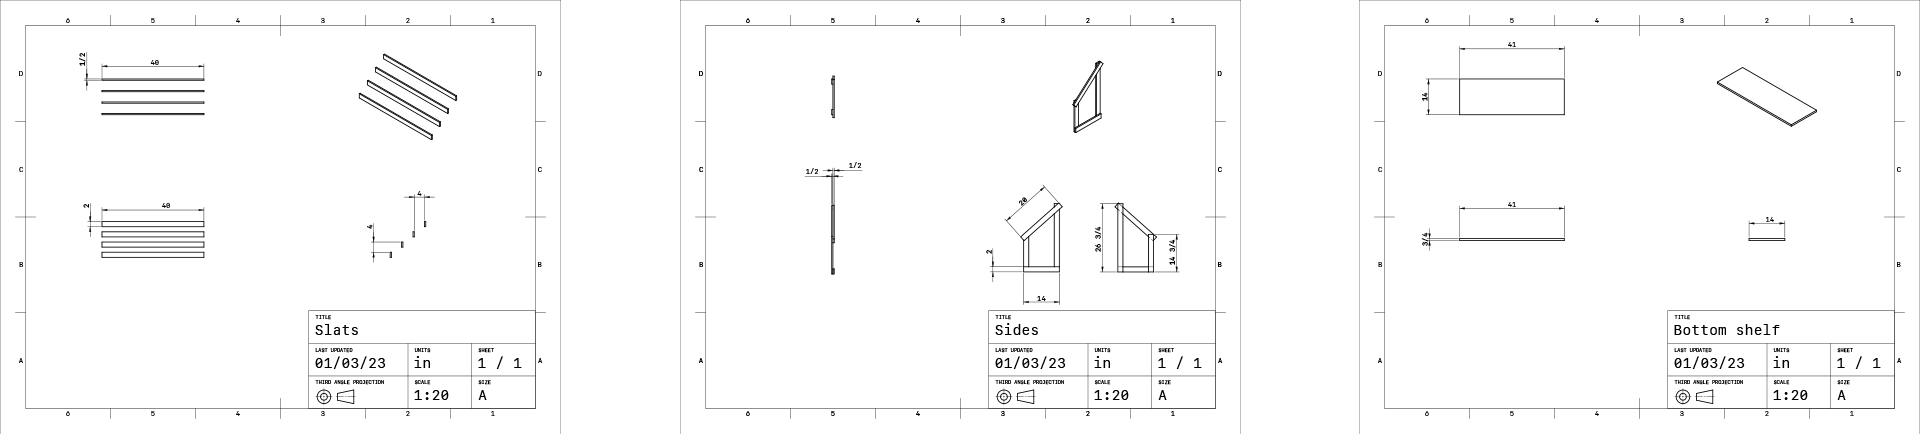
I figured I could cut 2-inch by 42-inch strips out of the plywood sheet, and trim the pieces to fit the geometry. I broke the design down into a “cut list:”
- Four 40”x2” for the slats
- Two 20”x2” for the slanted support to hold the slats
- Two 26 3/4”x2” for the rear uprights
- Two 14”x2” for the front uprights
- Two 14 3/4”x2” for the bottom shelf support
Additionally, I figured I’d use a scrap piece of MDF board for the bottom shelf:
- One 41”x14” bottom shelf
I put my circular saw to use on my saw track and mitre box to make all the cuts, which came out remarkably well. Due to a lack of options for fasteners, I used 1 1/4” #10 wood screws, which meant I needed another layer of material on the bottom shelf support joints. It ended up working out well because I used scraps from the cuts to add a little more surface to the bottom shelf support.
I pre-drilled all the screw holes (because the plywood will split otherwise) and did some creative pencil work with my square. Sadly, I was far too “in the moment” to take pictures of this part.
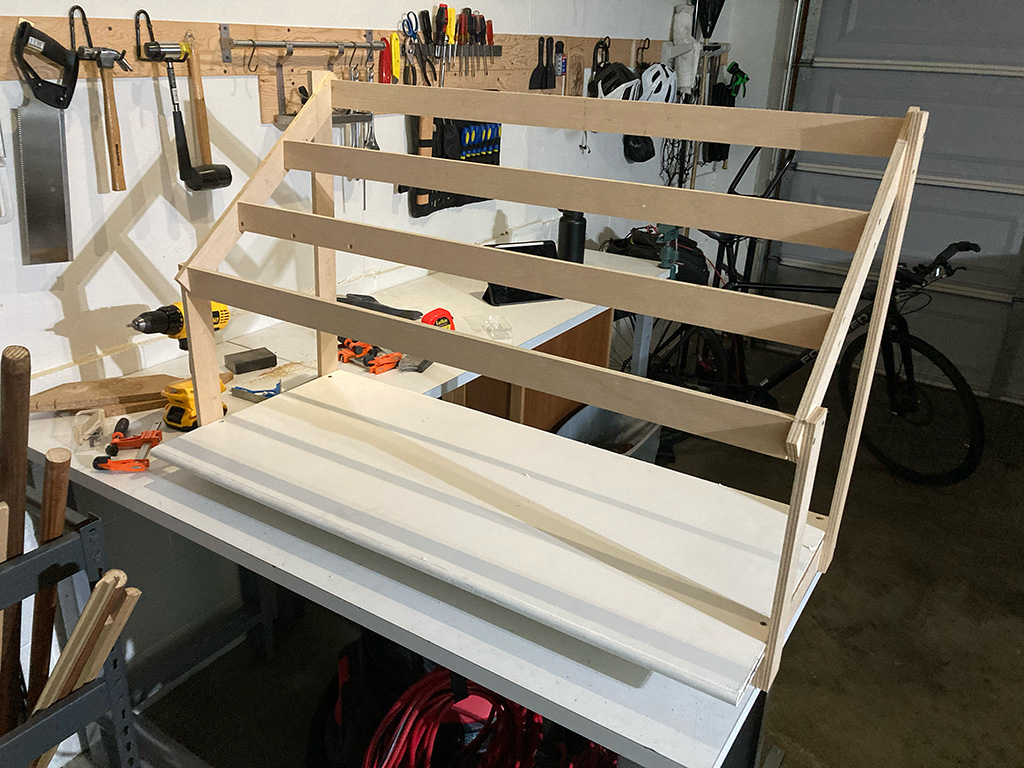
I realized my design lacked a front stop to keep the cardboard from sliding off the front of the shelf, so I nailed my last strip of 42”x2” plywood to the front. Also, I ended up using the full depth of my scrap MDF shelf, so there’s an extra 5 or 6 inches of shelf that sticks out from the front. I don’t hate it, and it might be more useful if I end up hanging this from the wall.