Paint fume extractor adapter for shop vacuum
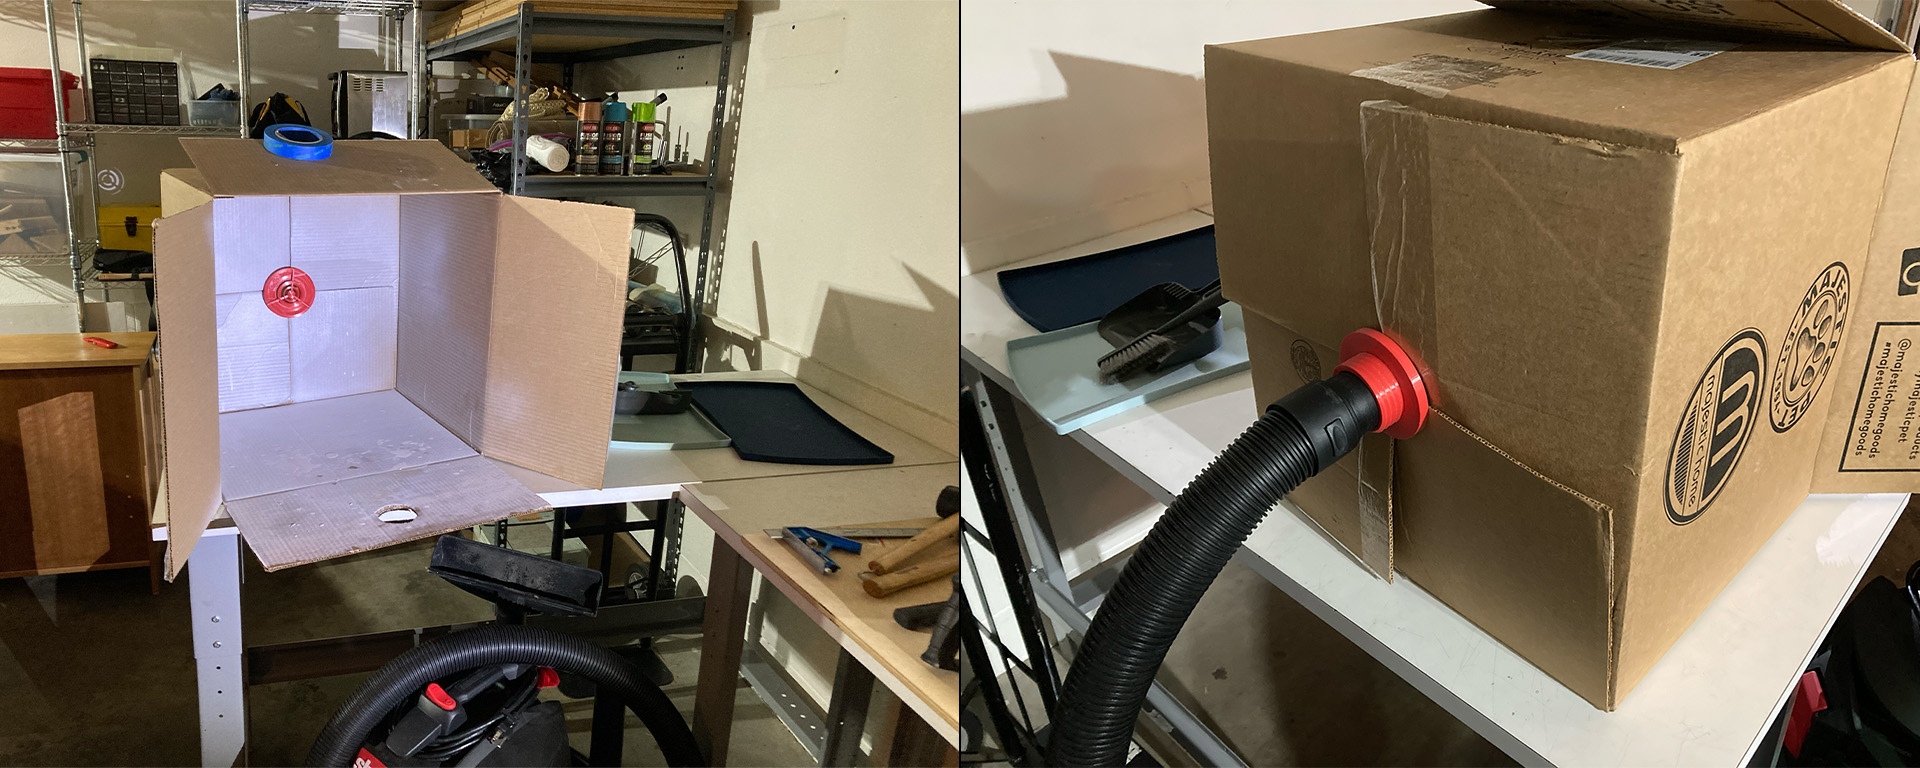
Recently, I designed and printed a battery box to power some new lights on my bike. The box is pretty great and feels reasonably study, but I wanted to give it a bit more of a protective coating to avoid friction from pulling the printed layers apart. I decided to make a cardboard spray paint booth and use my Shop Vac to pull fumes and particulate away from me. I don’t expect to paint much, so I wanted to avoid buying anything to make this booth. Fortunately, I keep a nicely-curated collection of cardboard for my machinations and I have a 3D printer and plenty of filament on hand!
I found a “medium-sized” 18x18” moving box that provided plenty of space to capture the spray from my spray can, and then I cut a hole in the box and used one of the vacuum attachments to vaguely redirect airflow into the hose. The idea worked well enough to keep most of the fumes and particulate under control, so I moved on to designing a chunky fitting that I could thread through a hole in the back of the box.
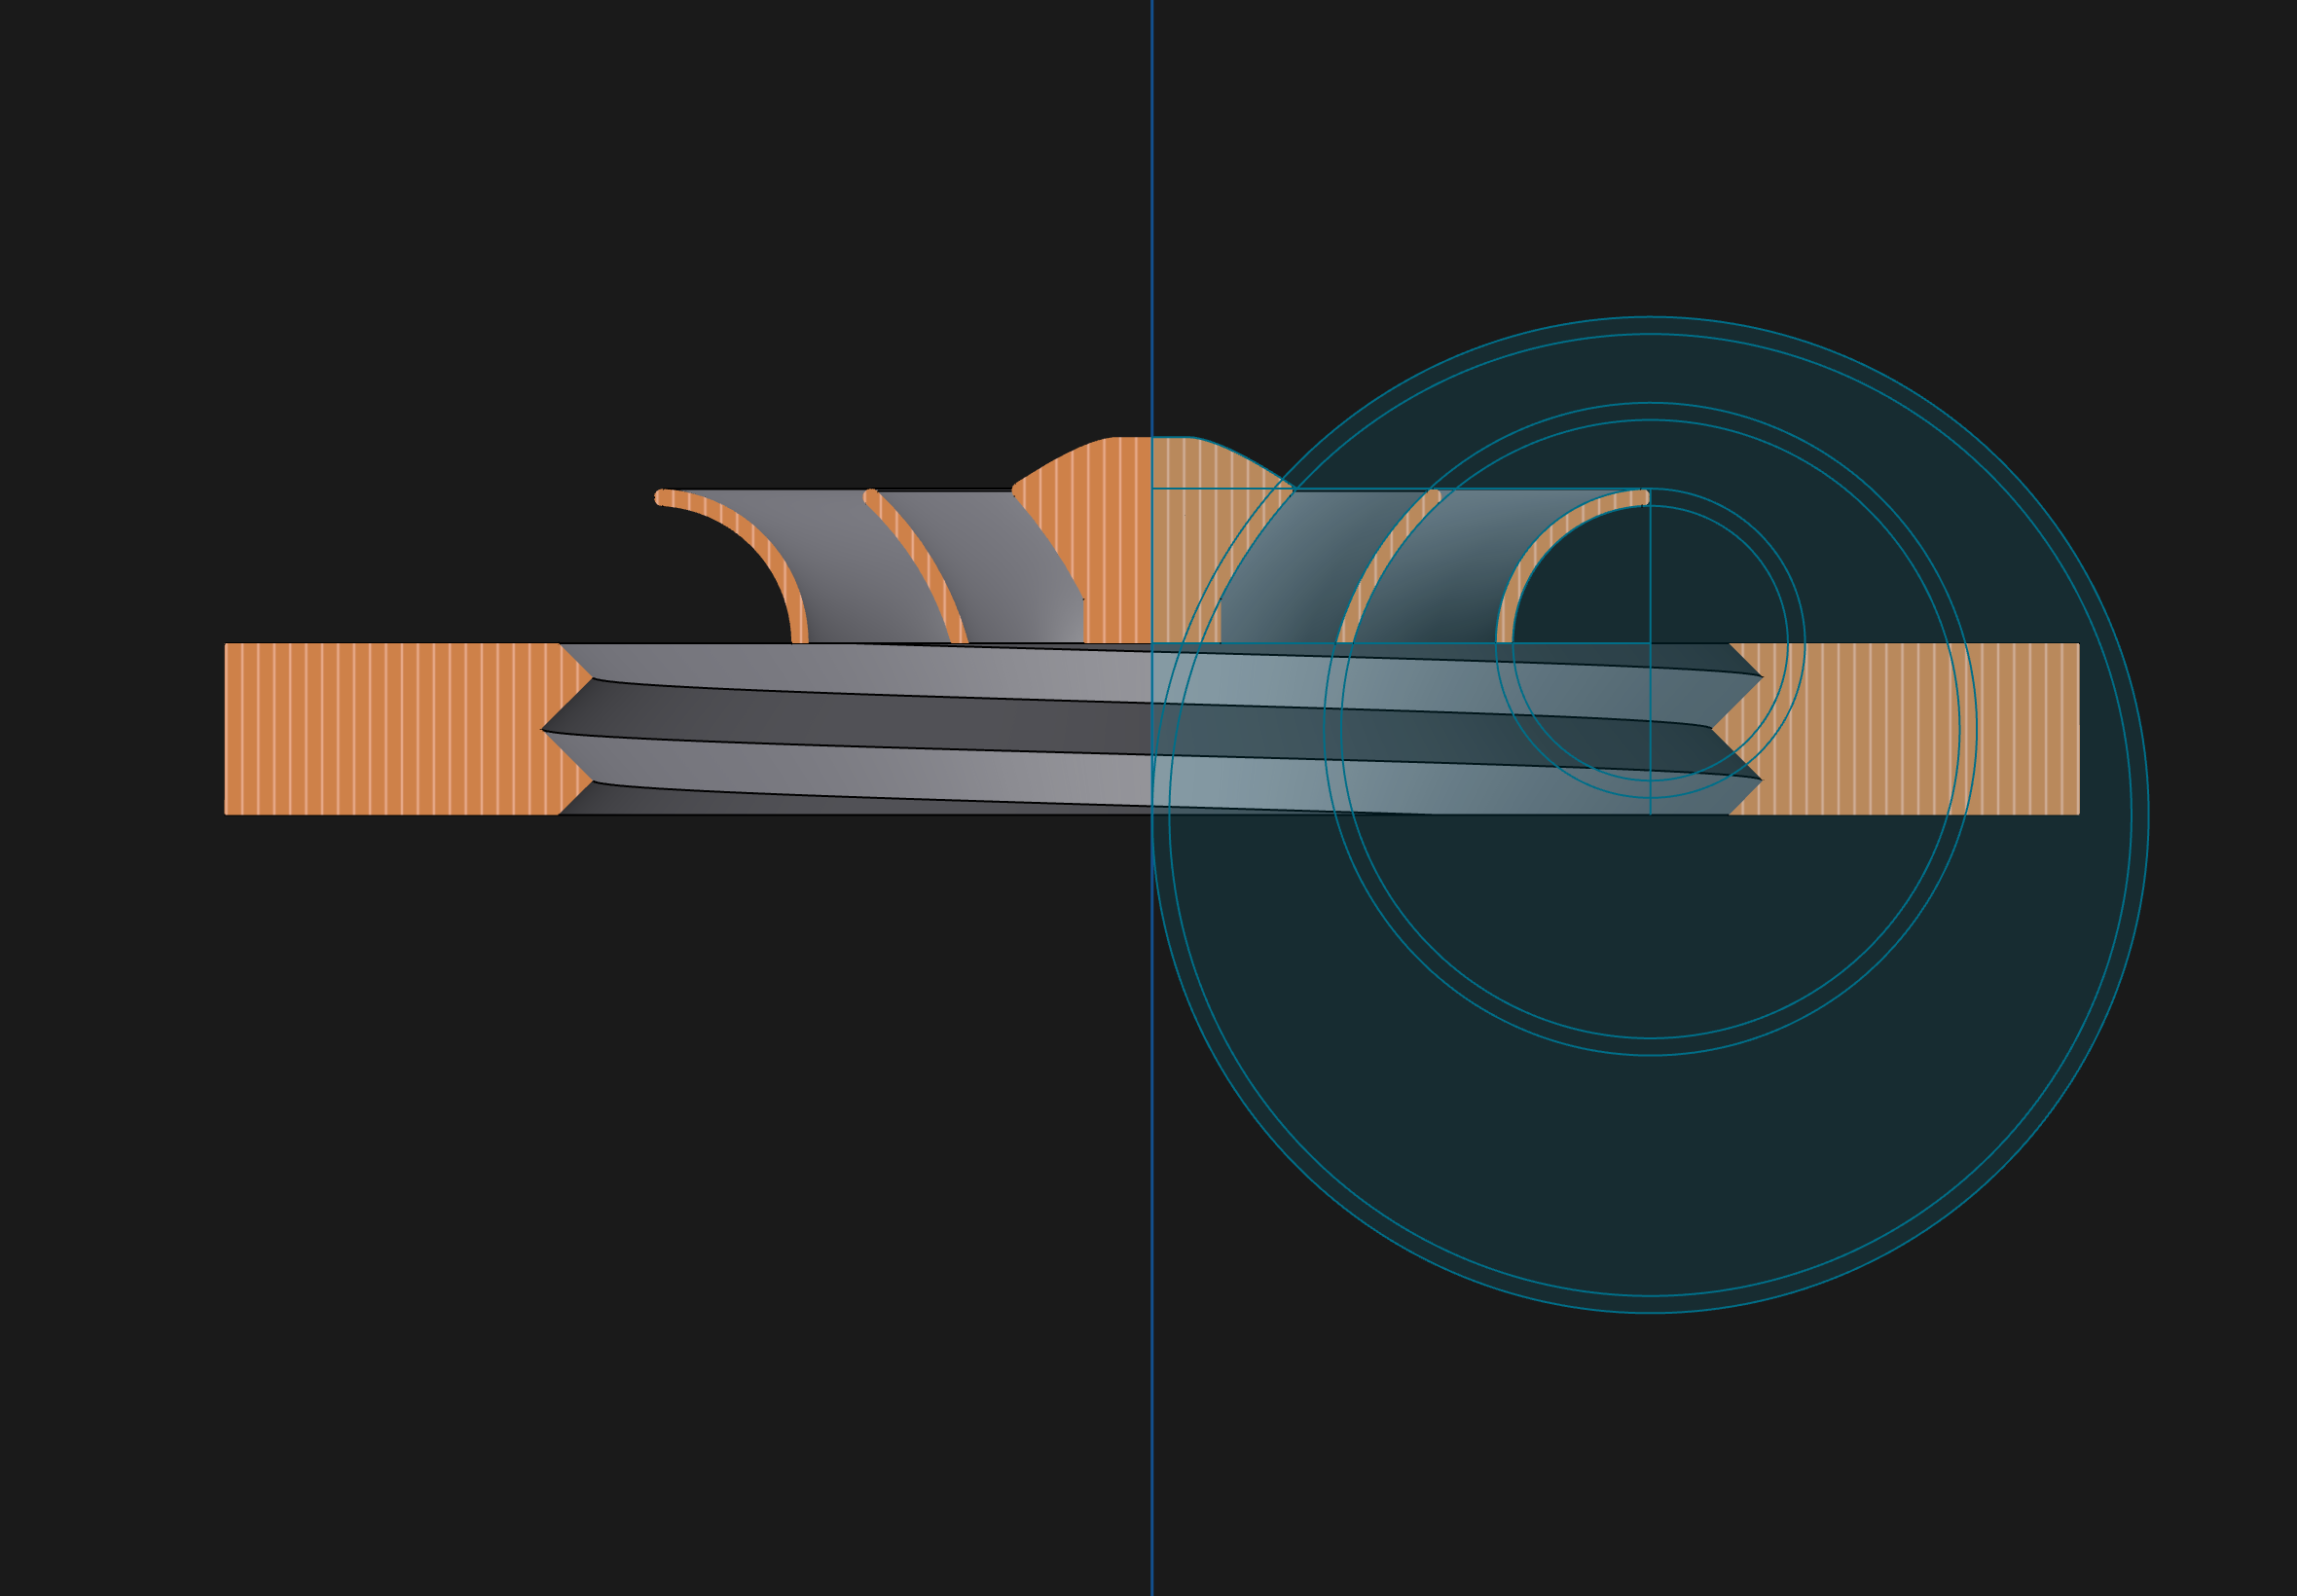
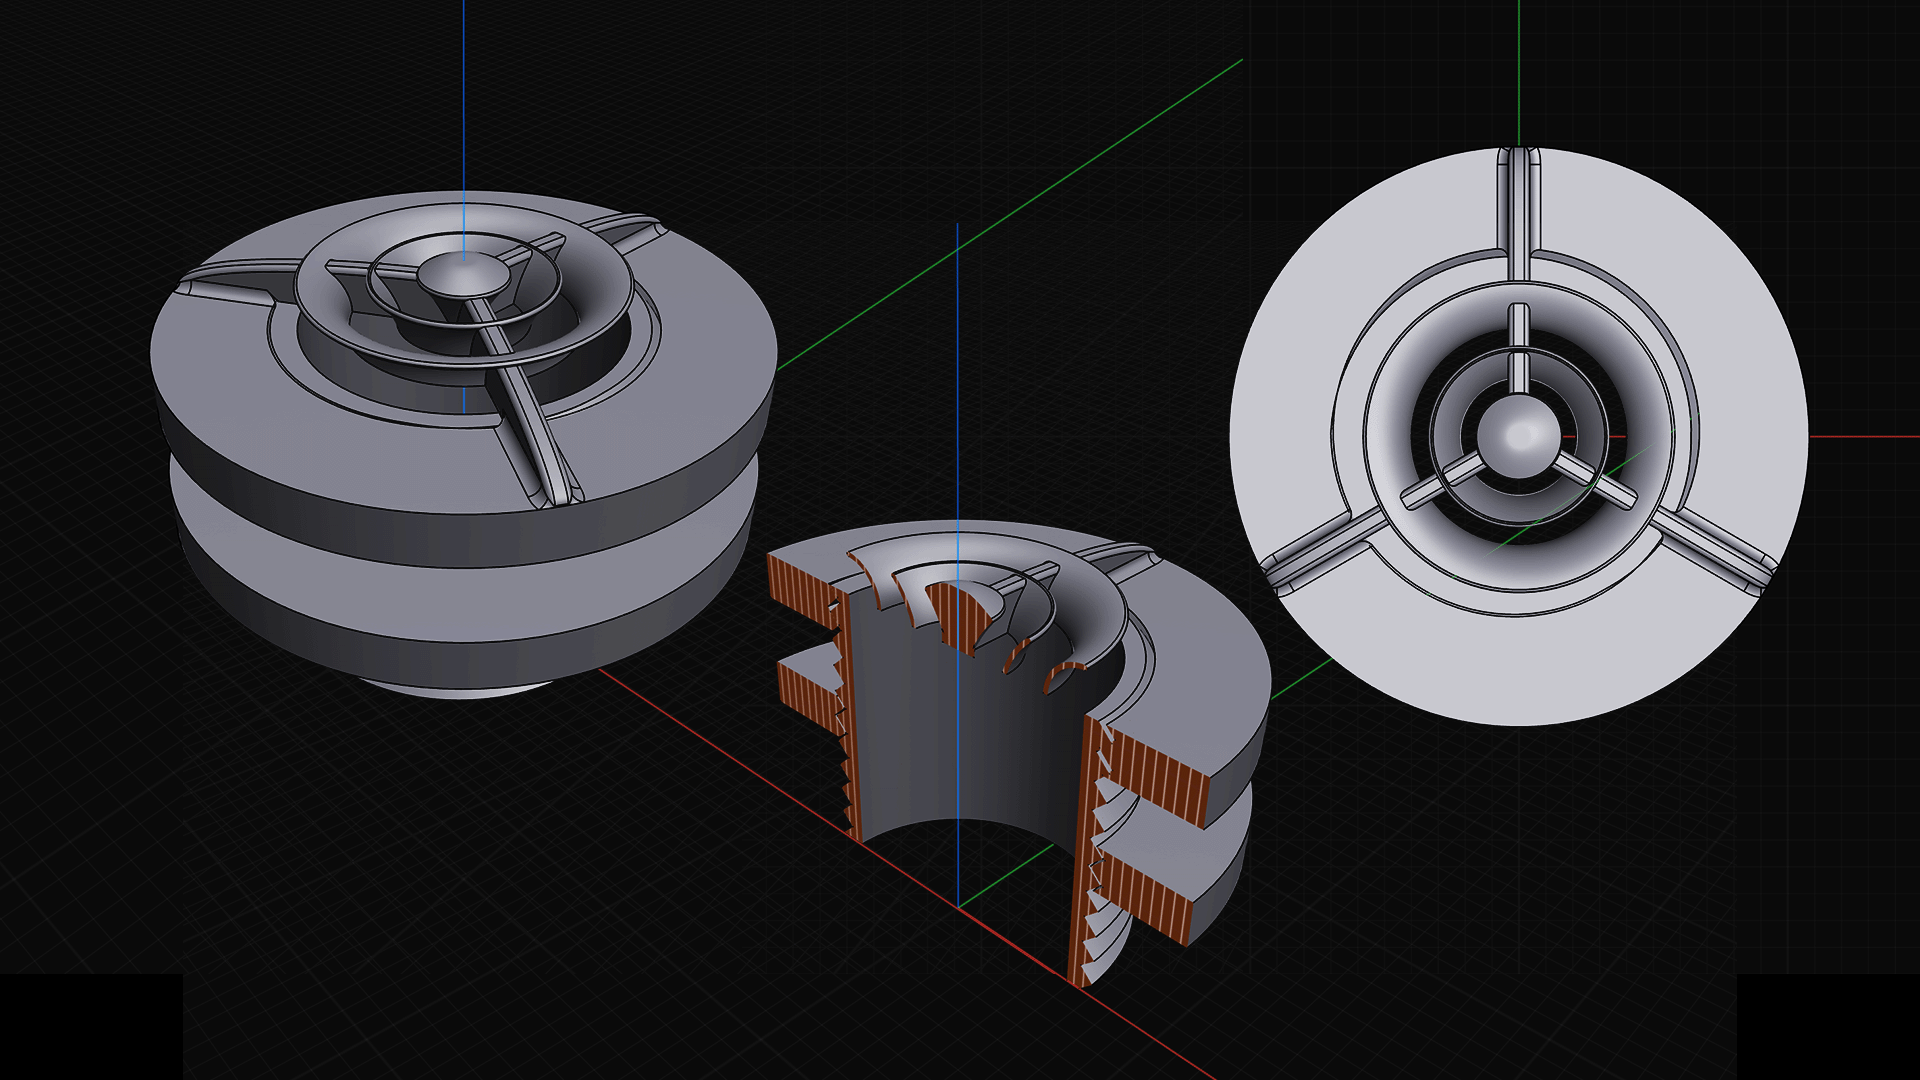
My vacuum hose’s outer diameter is roughly 57.5mm and needed about 30mm of insertion to maintain a snug fit. I designed a simple tube with an inner diameter of 58mm and a big threaded exterior.
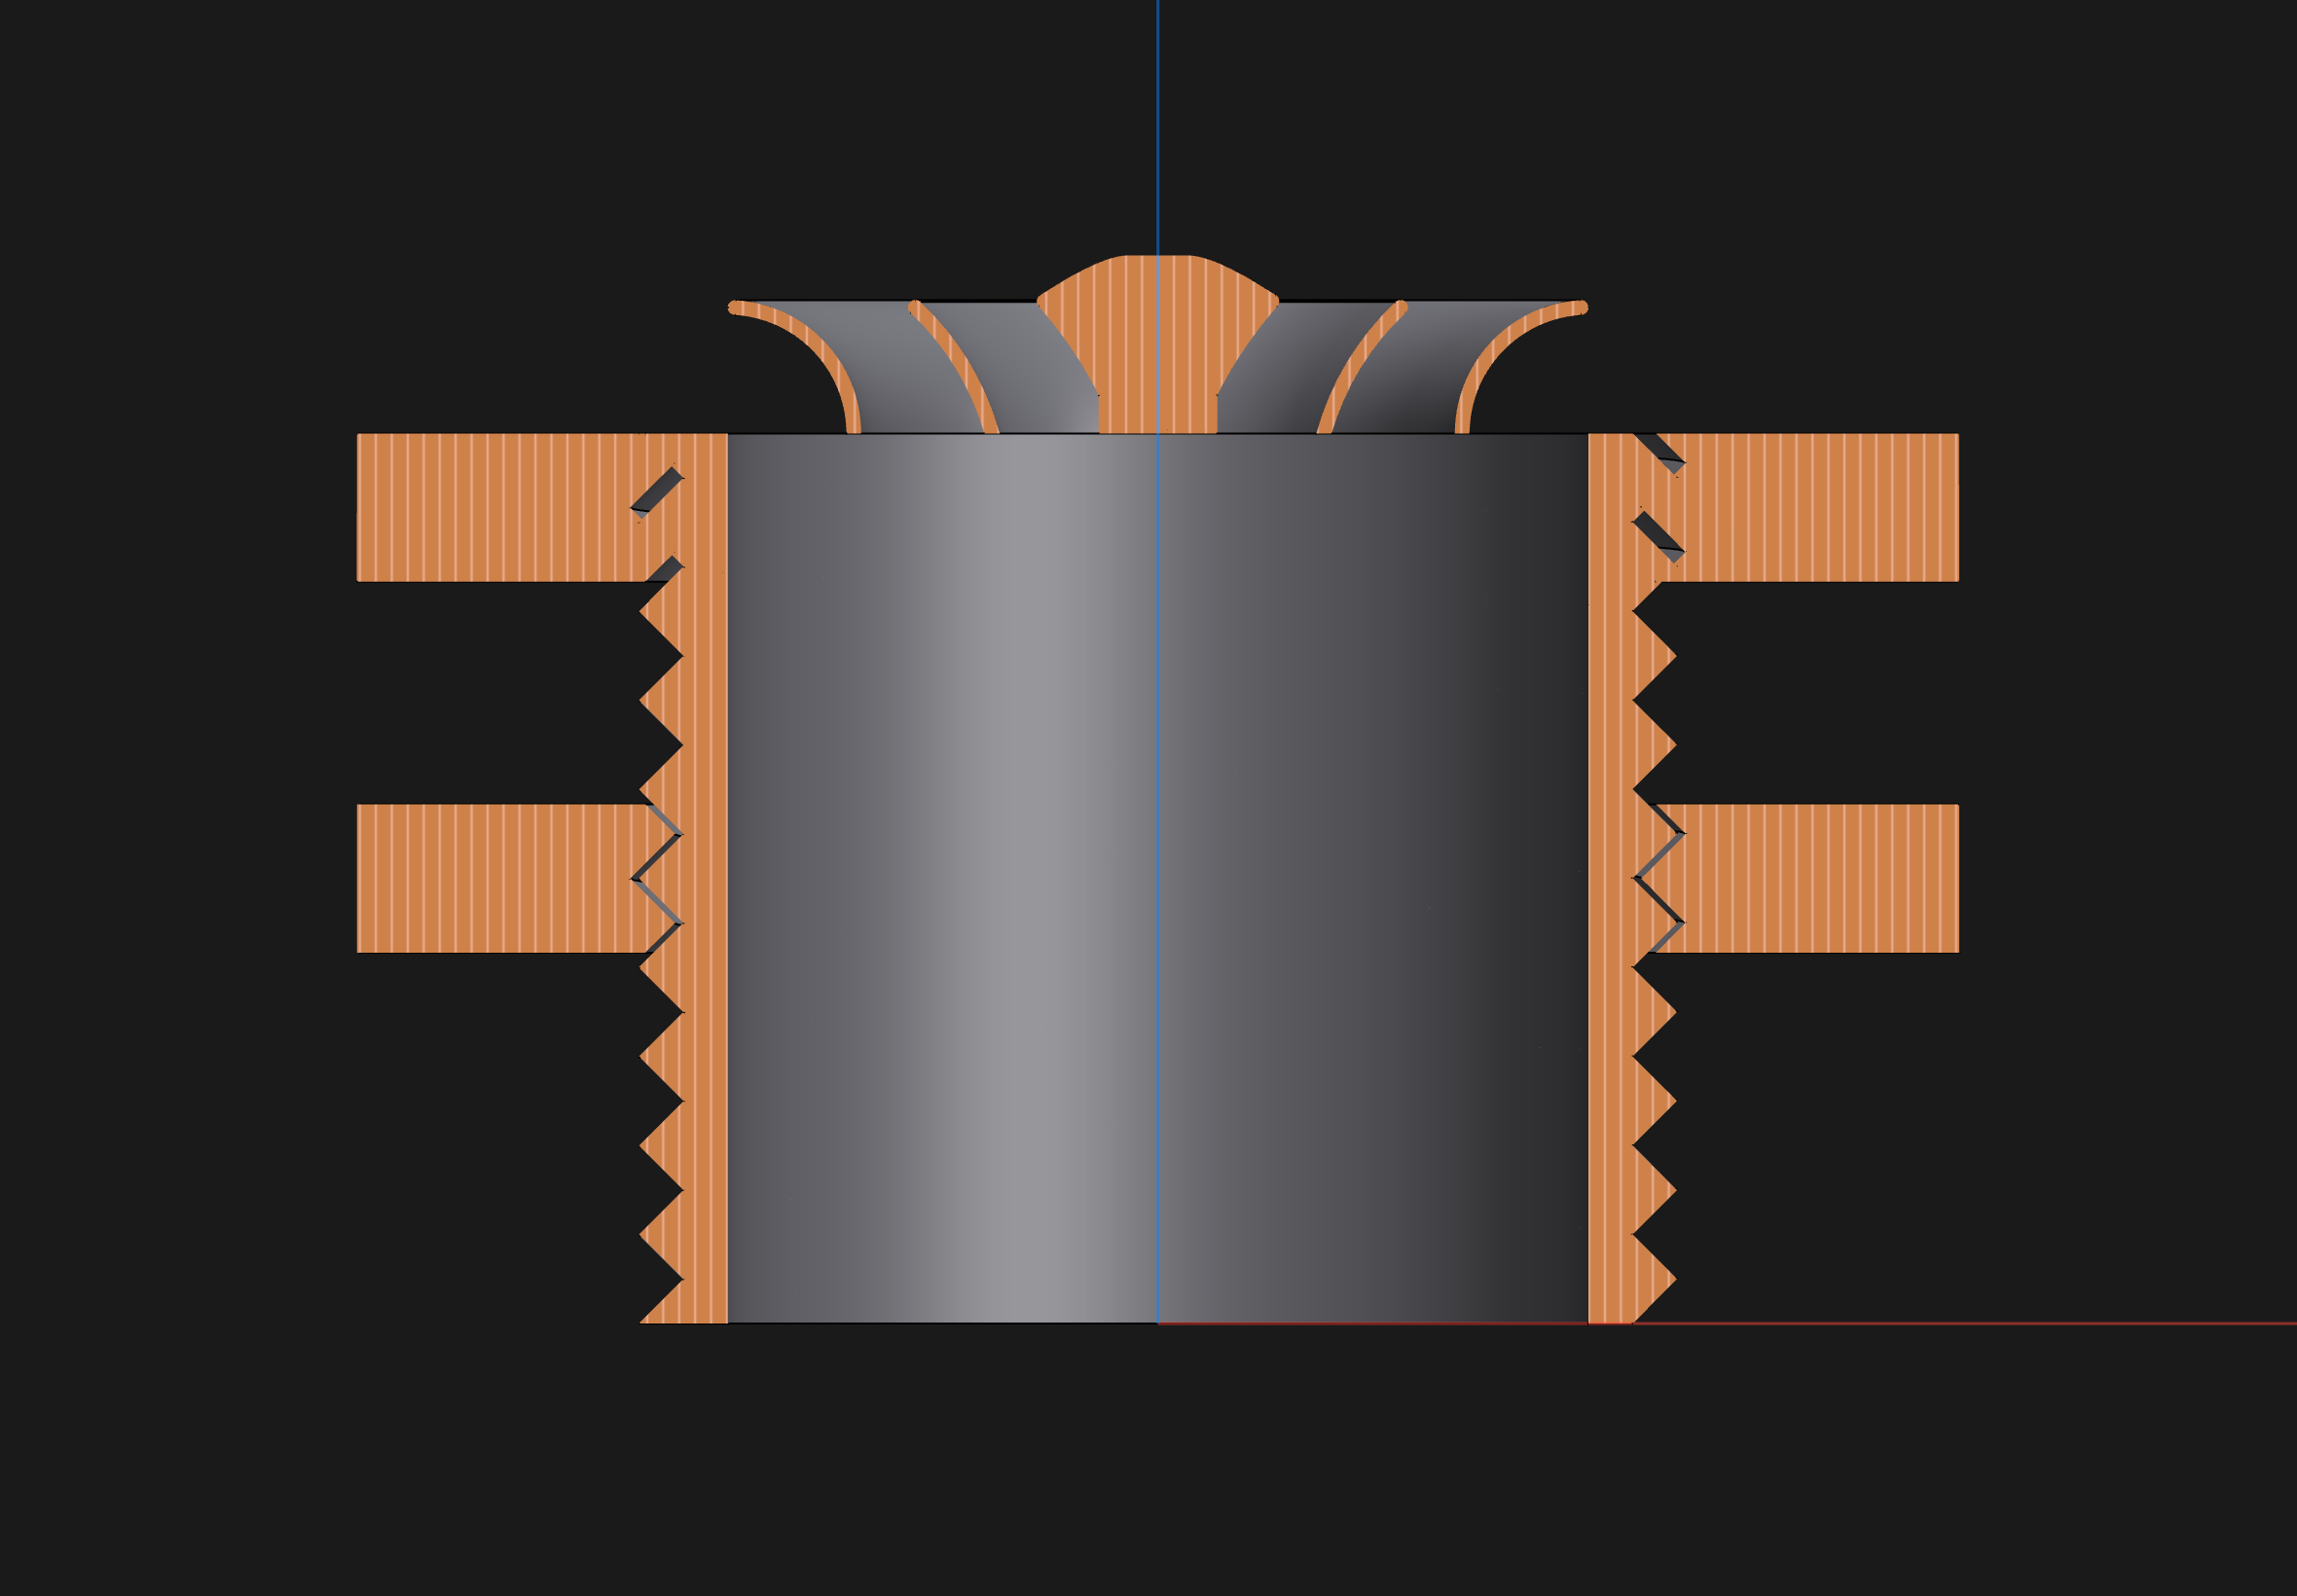
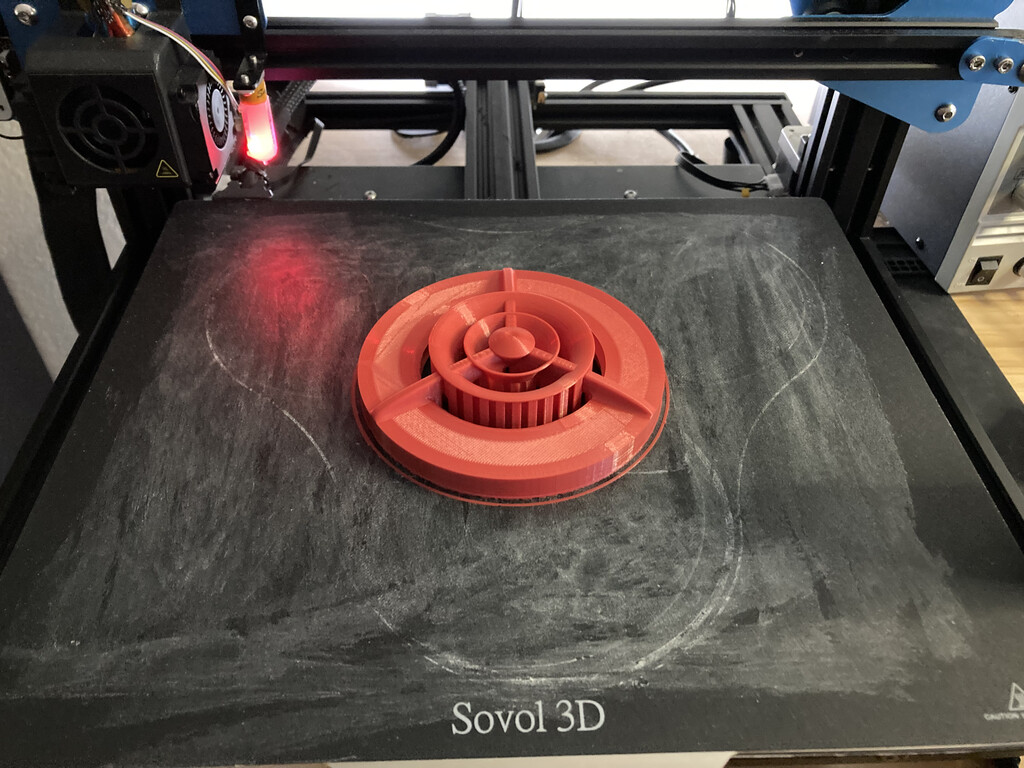
I needed this fitting to fit securely to a box with an imprecisely-cut hole, so I made a ring with 25mm of cross-section to provide coverage for irregular holes. I duplicated the ring to act as the base to the grille for the inlet to the fitting. I needed a grille because I wanted to avoid most items from accidentally getting sucked into the vacuum, plus I wanted to try to redirect airflow in order to pull air from a wider area along the back of the box. While I didn’t do any fancy airflow modelling, I did make an aesthetically-pleasing set of concentric circles.
Serendipitously, the weather was great for printing with only about 25% relative humidity. I got each of the parts printed over about 12 hours of total print time and they all worked on the first try. Everything screwed together and there was pretty minimal finishing work.
I did end up needing to sand the inside of the tube to get a snug-but-not-too-tight fit on the vacuum hose, but otherwise each of the pieces printed as designed.
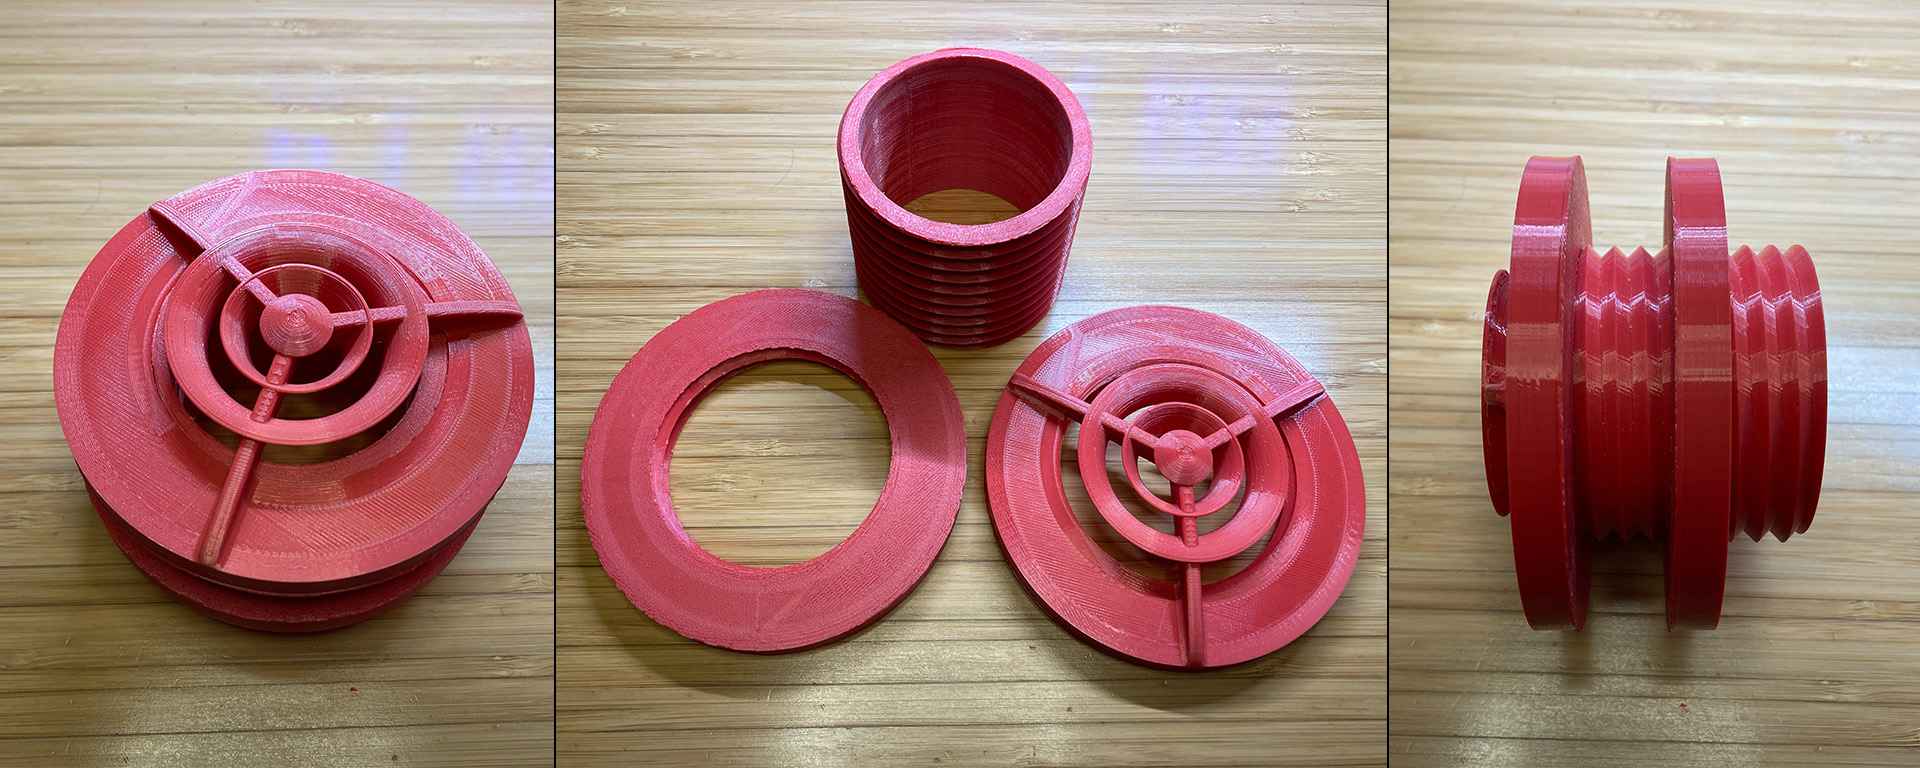
I cut a crude hole in the back of my cardboard box, threaded the tube through it and screwed the ring and grille into place. The fit was fantastic, and once I attached the vacuum hose and tested a spray, it was extremely effective!